Disclaimer
I wrote this painting guide a few years back already for Pats (https://wargamingwithsilverwhistle.blogspot.com) excellent 2nd Volume of Setting The Scene 'Creating a Wargames Layout for the Mediterranean'. As far as I know all three books of the series are currently out of print, but if you come across a copy on sale somewhere go get it! Pat has graciously given his OK for me to release both of the painting guides I wrote for the book here on the blog.
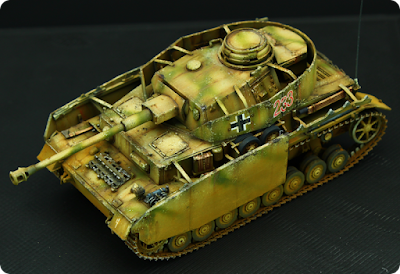
As I feel the guide on Italian Infantry, especially the pictures, could do with a little updating, here's the guide for how I paint hard edged camouflage on vehicles. And remember: You can use this for any hard edged camouflage scheme you want. Not just Italian tanks.
Painting tanks - Hard edged camouflage
There are probably several hundreds if not thousands of tutorials on this topic out there already. Starting from a very basic approach for those amongst us wanting to bring their toys on the table as fast as possible up to display masterpieces by the likes of Mig Jimenez and others you'll most certainly find something to meet your own needs.
What I was aiming for with this short tutorial here was something in the middle ground. Something that wouldn't take ages to complete while still looking the part when put either in your display cabinet or on your gaming table of course. Due to the use of Oils and Enamels you'll need some patience because of the relatively long drying times, especially when compared to Acrylics. But not factoring in the drying times it took me about three hours to complete the whole tank.
As always the model was thoroughly cleaned before the actual painting begun. It's also during this stage that I add some bits and pieces like sand bags made from green stuff, fuel drums, bags and blankets available through many different manufacturers out there. It's details like these that will help to tell a story and transform a standard kit into the center piece of your force.

Step 1: Base Coat
For the base coat, I use the same Vallejo Surface Primer German Panzer grey RAL7021 as for the figures. Letting the primer settle overnight helps to make it as hard wearing as possible. That's especially important with resin and white metal pieces as the paint comes off much more easily than with plastic kits.


This is followed by AK032 Russian 4BO Light Base sprayed onto the middle of each area, making sure to leave most of the previous paint visible around edges and crevices. This is followed by a last light spray of AK033 Russian 4BO Highlights again be careful not to cover too much of both the previous paints. Now let the paint dry for a few hours in preparation for the next step.


Once the paint has dried thoroghly you can remove the masking putty. The putty can be used several times so instead of throwing it away you can put it into a ziplock for use on your next project. Before we get to the next step give your model a short coat of varnish. At this stage it doesn't really matter if you use Matt, Satin or Gloss Varnish as it's just meant to protect the relatively thin coat of paint you've applied thus far.


Step 6: Chipping and Highlighting
Using A.MIG Dunkelgelb-905 Shine diluted to a milk like consistency we know carefully highlight all the corners, bolts and edges by drawing a fine line with a brush. I tend to interrupt the line in irregular spaces so it looks more like faint paint chipping than an unnaturally straight line, thus incorporating the highlighting into the weathering.


Step 7: Pinwash
AK Enamel Wash for DAK vehicles is then painted around rivets, in recesses and along the seams of armour plates. While it's important not to flood the whole vehicle with the wash but to let the capillary effect work for you to let it seep into and around the features you want to pick out, we don't need to be overly diligent. Any mishaps can be easily cleaned up afterwards. Give the wash about 20 to 30 minutes to settle.

As the effect is yet a little too stark a brush damp with white spirit is used again to remove most of the wash, leaving only faint traces around rivets and in the recesses. This is usually enough to give an impression of depth but we can always repeat this step to increase its effect. Now the enamel is given time to settle properly over night and then a coat of satin varnish is applied to protect our paint job thus far.

Step 8: Streaking
Once the previously applied varnish has dried it's now time to come to the weathering proper. Random streaks of enamel based AK Streaking Grime and AK Rust Streaks are now painted onto the vertical surfaces of your tank by simply drawing a vertical downward line starting around some of the rivets and scratches in the paint. At this stage it doesn't really matter how long those streaks will be in the end. Just keep in mind not to overdo it as together with the previously applied Filter and Pin Wash the whole appearance might get too dark. Leave the enamel to dry for about 20 minutes.

Now we work on the streaks using a brush dampened with White Spirit. The brush is run downward over the streaks removing most of the paint in the process. This step is repeated till the streaking is only just visible. During the process you can use the brush to carefully manipulate the pigments creating thicker and longer or thinner and shorter streaks. Variety is key here so make sure that not one streaks looks like the ones just next to it.

Again the enamels based paints need some time to dry before apllying another coat of varnish. It's best to leave the tank sit for a few hours or even over night.

Step 9: Painting the details
Now is the time to paint all the details like headlights, stowage and eventual crew figures. Also during this stage the rubber on return rollers and road wheels is painted using VMC German Dark Grey while the tracks get a coating of VMC Flat Earth to represent mud and dirt.


Step 10: Rusted exhaust
Exhausts on tanks and vehicles are the perfect chance to break up the otherwise relatively drab colour scheme and add some bright focal point to the vehicle. First the exhaust is painted with VMC Mahagony Brown. The actual rust effect is then dabbled onto the exhaust with a stiff bristled brush using the goo which has accumulated in the bottle cap of AK Enamel Wash Light Rust. When applying the last coat of varnish later on, some of the effect will probably be lost. To rectify this just dabble on some more of the goo after the varnish thus also adding more depth to the rust.


Step 11: Pigments
The final weathering step is the application of pigments, especially around the lower hull, to represent dust and dirt accumulated during use. The dry pigments are liberally applied with a flat, stiff bristled brush, paying close attention to where dirt would accumulate normally. Once satisfied with the look Pigment Fixer is used to seal the pigments in place. Be careful not to flood the area in question with the fixer but apply it in small drops and let the capillary effect do the work for you. Once the fixer has dried give your model a final coat of matte varnish. After the varnish has dried you could now give the tracks a last, very gentle drybrush with a bright metallic paint to simulate where the dirt had no chance to accumulate due to the constant contact with a hard surface.

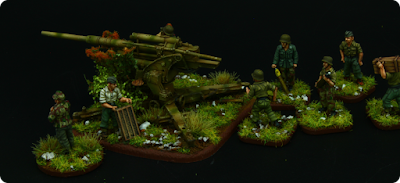
I feel a word of caution is necessary here. I think it's important to use pigments which if not matching the basing of your infantry, that would at least not stand apart too much. It would look rather strange if your tanks running gear was caked in red dust while the bases of your foot sloggers have the distinct yellow of desert sand.
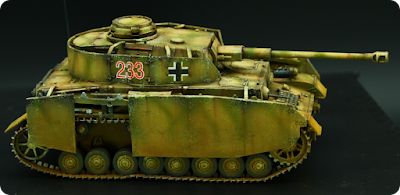
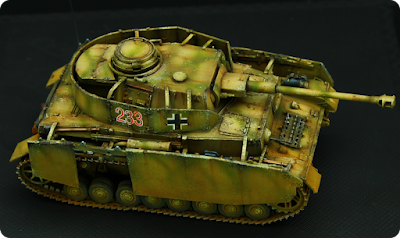
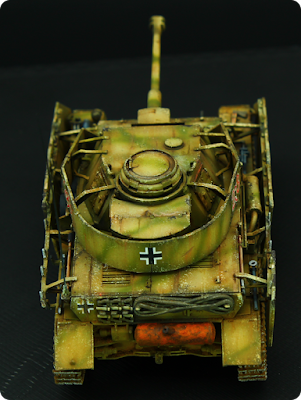
The finished piece


Step 2: Green Camouflage Stripes
It may sound curious, but the paint for the green camouflage stripes is applied first. On a real vehicle this would have been applied on top of the yellow base coat. So the base colour of AK 031 Russian 4BO Base is sprayed all over the vehicle using an airbrush.

This is followed by AK032 Russian 4BO Light Base sprayed onto the middle of each area, making sure to leave most of the previous paint visible around edges and crevices. This is followed by a last light spray of AK033 Russian 4BO Highlights again be careful not to cover too much of both the previous paints. Now let the paint dry for a few hours in preparation for the next step.

Step 3: Masking the camouflage stripes
After letting the camouflage green dry thoroughly it's time for masking the green camouflage stripes before applying the yellow base paint. Here I use UHU patafix reusable glue pads. Other brands like Bostik Blu Tac work just as well as do more expensive offerings for scale modelers like MXpression Panzer Putty. No matter what you use it's important to press the edges of your masking medium down to prevent paint from seeping under it and ruining your camouflage scheme. I used a toothpick to press the masking putty into every nook and cranny. It was at this stage I decided not to bother with camouflage stripes on the lower hull section.

Step 4: Yellow Base Coat
Now A.MIG-902 Dunkelgelb Base is sprayed all over the tank, making sure nothing of the previous green camouflage paint remains visible. This again is followed by A.MIG-904 Dunkelgelb Highlight. Again make sure to only apply the paint to the middle of each area or panel leaving the Dunkelgelb base visible around the edges of each area and in the crevices. Now a last careful light is sprayed on all the upper horizontal areas using A.MIG-905 Dunkelgelb Shine. As before it's important not to spray over too much of both the previously applied shades of Dunkelgelb or you'll lose the shading effect.
Once the paint has dried thoroghly you can remove the masking putty. The putty can be used several times so instead of throwing it away you can put it into a ziplock for use on your next project. Before we get to the next step give your model a short coat of varnish. At this stage it doesn't really matter if you use Matt, Satin or Gloss Varnish as it's just meant to protect the relatively thin coat of paint you've applied thus far.

Step 5: Oil Dot Filter
A Filter basically is a rather easy way to subtly change the appearance and intensity of your vehicles colours. It helps to give a slightly faded impression and adds interesting colour graduations to an otherwise rather flat paintjob. A Filter thus is the first subtle step in weathering your model.
Small amounts of different oil paints, I simply use cheap ones from the craft store, are put onto some kitchen paper. Generally it's not that important which specific colours you use, but more the overall effect you're after. For this tank I was aiming for a warmer appearance and thus used various warm browns, reds and some yellow but only a little bit of green.
Let the paint sit for a few minutes so the kitchen paper will soak up the superfluous linseed oil. Then apply small dots of your oil paints all over the tank. It's usually best to apply brighter colours to the upper parts of the vehicle, where light would usually shine on, while darker paints work best on the lower parts like the running gear.

A soft brush, dampened (not soaked!!!) with white spirit is then used to dilute the oils. Use soft and careful brush strokes from top to bottom to almost completely remove and blend the different colours. Make sure to wipe your brush regularly on kitchen paper in between. When your brush is dry and leaves almost no traces on the paper reload it with White Spirit.
Sometimes you'll need to repeat this several times till you get the desired effect. Less is definitely more in this step as all you want to achieve is a subtle change in colour, no stark contrast.

On the picture below you can see the difference between our tank with the filter applied and a vehicle which has not yet recieved the oil dot filter. As you can see the difference is quite marked.
Once the oil paint has dried overnight a coat of satin varnish is applied.

Step 6: Chipping and Highlighting
Using A.MIG Dunkelgelb-905 Shine diluted to a milk like consistency we know carefully highlight all the corners, bolts and edges by drawing a fine line with a brush. I tend to interrupt the line in irregular spaces so it looks more like faint paint chipping than an unnaturally straight line, thus incorporating the highlighting into the weathering.

Once your edge highlights are done the Dunkelgelb is diluted even further and small scratches and splodges are painted randomly all over the tank using a brush with a sharp tip. You really don't want these fine marks to stand out but give more of an impression of worn off paint.

To simulate deeper marks in the paint some of the previously applied scratches are picked out with VMC German Camo Black Brown leaving a little of the Dunkelgelb visible to give a certain 3D effect. Make sure to concentrate mostly on areas which would normally see the most wear and tear like along the edges or on horizontal areas where crew might step during maintenance.
Don't over do this step as the whole effect would get lost.

Step 7: Pinwash
AK Enamel Wash for DAK vehicles is then painted around rivets, in recesses and along the seams of armour plates. While it's important not to flood the whole vehicle with the wash but to let the capillary effect work for you to let it seep into and around the features you want to pick out, we don't need to be overly diligent. Any mishaps can be easily cleaned up afterwards. Give the wash about 20 to 30 minutes to settle.

As the effect is yet a little too stark a brush damp with white spirit is used again to remove most of the wash, leaving only faint traces around rivets and in the recesses. This is usually enough to give an impression of depth but we can always repeat this step to increase its effect. Now the enamel is given time to settle properly over night and then a coat of satin varnish is applied to protect our paint job thus far.

Step 8: Streaking
Once the previously applied varnish has dried it's now time to come to the weathering proper. Random streaks of enamel based AK Streaking Grime and AK Rust Streaks are now painted onto the vertical surfaces of your tank by simply drawing a vertical downward line starting around some of the rivets and scratches in the paint. At this stage it doesn't really matter how long those streaks will be in the end. Just keep in mind not to overdo it as together with the previously applied Filter and Pin Wash the whole appearance might get too dark. Leave the enamel to dry for about 20 minutes.

Now we work on the streaks using a brush dampened with White Spirit. The brush is run downward over the streaks removing most of the paint in the process. This step is repeated till the streaking is only just visible. During the process you can use the brush to carefully manipulate the pigments creating thicker and longer or thinner and shorter streaks. Variety is key here so make sure that not one streaks looks like the ones just next to it.

Again the enamels based paints need some time to dry before apllying another coat of varnish. It's best to leave the tank sit for a few hours or even over night.

Step 9: Painting the details
Now is the time to paint all the details like headlights, stowage and eventual crew figures. Also during this stage the rubber on return rollers and road wheels is painted using VMC German Dark Grey while the tracks get a coating of VMC Flat Earth to represent mud and dirt.


Step 10: Rusted exhaust
Exhausts on tanks and vehicles are the perfect chance to break up the otherwise relatively drab colour scheme and add some bright focal point to the vehicle. First the exhaust is painted with VMC Mahagony Brown. The actual rust effect is then dabbled onto the exhaust with a stiff bristled brush using the goo which has accumulated in the bottle cap of AK Enamel Wash Light Rust. When applying the last coat of varnish later on, some of the effect will probably be lost. To rectify this just dabble on some more of the goo after the varnish thus also adding more depth to the rust.


Step 11: Pigments
The final weathering step is the application of pigments, especially around the lower hull, to represent dust and dirt accumulated during use. The dry pigments are liberally applied with a flat, stiff bristled brush, paying close attention to where dirt would accumulate normally. Once satisfied with the look Pigment Fixer is used to seal the pigments in place. Be careful not to flood the area in question with the fixer but apply it in small drops and let the capillary effect do the work for you. Once the fixer has dried give your model a final coat of matte varnish. After the varnish has dried you could now give the tracks a last, very gentle drybrush with a bright metallic paint to simulate where the dirt had no chance to accumulate due to the constant contact with a hard surface.

I feel a word of caution is necessary here. I think it's important to use pigments which if not matching the basing of your infantry, that would at least not stand apart too much. It would look rather strange if your tanks running gear was caked in red dust while the bases of your foot sloggers have the distinct yellow of desert sand.
The finished piece