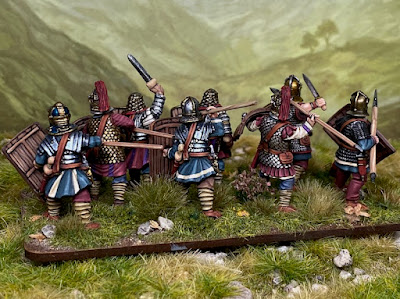
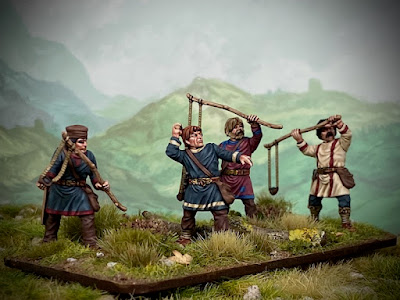
Continuing on from last years theme I'm back, or better still painting away on my Middle Imperial Roman project for Midgard. My Romans are more or less done, so I've to do the opposition now it seems.
Moiterei's bunte Welt
Part of 'Sitzkriegheroes Hollfeld' since 2012
21 February 2026
Siegfried the Dragon Slayer
Orc and Orcling
A couple of friends and I spent the last few days together painting miniatures and talking rubbish. A great time was had and as a result of this I came home with something a little unusual for me: An Orc. I'm not quite sure if it's an official GW miniature or not, but it was great fun to paint anyway.
 |
| Roman Lanciarii in for a nasty surprise |
28mm Kev Adams Orcs
For various reasons I've not found much time for painting lately, so you've got to contend with these two fellows down here for the time being.
Figures are sculpted by Kev Adams and available through Ral Partha. The backdrop is available from Handiwork Games and I can only recommend you giving them a try.
21 December 2025
3rd Century AD Roman Commanders
What would be a force, or battlegroup (I hate the use of the word army for a handful of miniatures), without its commanders? Looking back in time, reminiscing on my astounding track record of glorious defeats the answer would, in my case, certainly be „better off“.
In games of Midgard by Reisswitz Press (and many other rulesets) the use of commanders on the table top is critical to how your troops function on the table. They're based separately and might roam the battlefield freely in order to perform their mighty deeds without being attached to a specific unit, but only able to influence their assigned units. Thus they're the perfect opportunity to create little vignettes.
Figures as usual are a mix of Victrix Miniatures, partially converted with heads from Aventine Miniatures and Armorum & Aquila Miniatures. Shields are hand painted as usual and the figures were photographed in front of a Handiwork Games backdrop.
3rd Century AD Roman Auxiliaries
And on it goes with my Middle Imperial Romans. I can't remember when the last time was I had so much fun with a project. Though truth be told I'm by now rather looking forward to also paint some opponents for these fellas. For today though I've got two bases of lightly armoured Auxiliaries. Figures are a mix again of Victrix Miniatures and Footsore Miniatures, both converted with suitable metal heads by Aventine Miniatures and interspersed with a few Armorum & Aquila Miniatures. Shields are all hand painted as is the case with all the others throughout this project.
The figures were photographed in front of a backdrop by Handiwork Games.
Thanks for watching and stay safe!
19 October 2025
3rd Century AD Roman Legionaries
All those months later and I‘m still continuing with my 3rd Century Romans for use with Midgard by James Morris. As usual I'm not overly productive, but I have lots of fun with this project. A big part of that fun stems from mixing, matching and converting figures from different manufacturers to tell a story with each base. Figures used are a mix of Wargames Atlantic, A&A Miniatures, Footsore Miniatures, Victrix Miniatures and Aventine Miniatures.
The backdrop used in these photos comes from Handiwork Games. They add a lot of atmosphere without much effort and I heartily recommend you giving them a try.
18 March 2025
3rd Century AD Roman Lanciarii
Winter is finally drawing to a close and neither have I been as productive as I had planned -not that I was expecting much, mind- nor have I been as active as I had intended. While I'm sitting here at my desk I can gaze upon all the figures that I set out to paint this year and it's a bit of a sobering sight. But you're not here to see me dwell on my failures, are you?
As I'm a little bit... special, when it comes to mixing units I painted years ago with freshly painted units, I decided to intermix the 5 Lanciarii I had already painted a while back, with these new models. Giving me two bases for use in Midgard. You almost see no difference in painting style. If that's a good thing or not a leave to you to decide.
21 February 2025
3rd Century AD Roman Legionaries
14 February 2025
3rd Century AD Burgundians...or was it Romans?
I welcome you to my first post this year, and yes, I'm a little bit embarrassed myself. But what should I do? I was busy with important things. Like... procrastinating?
30 December 2024
AHPC#2: Panzer IV Ausf. A


