Well, OK. I've promised to write this Colour Guide for way too lang already. And in actual fact I already posted it on Twitter way back, but as that's not really the most well suited platform for such a thing, I thought I should finally get my finger out and post it over here as well. For posterity so to speak ;-)
Todays topic is the Eichentarn camouflage (oak leaf camouflage pattern) in its winter version as used by the Waffen-SS on Zeltbahnen, camouflage smocks and helmet covers. If you're after the summer version just click here.
My painting style is based on the so-called Triad-System or Foundry System in which you use a Shade as the darkest colour. Then you paint over it using what is called a Base Colour (in general the actual colour you want to achieve for the piece you're just painting) leaving the Shade show only in the folds and recesses, followed by a Highlight on the points which will catch the most light. However, I'm using intermediate steps to make the transitions between the different colours much smoother.
Thus typically the steps I use would look somewhat like:
Shade - 50/50 mix Shade/Base - Base - 50/50 mix Base/Highlight - Highlight
In general what I'll give you in this tutorial is the three colours as if used as simple triads. If you prefer the more elaborate approach just add in the intermediate steps mentioned above, or start from an even darker Shade or end with a lighter Highlight.
If fractions in brackets are given these are just approximations. Just try what looks best to you.
Note: I haven't documented every single step for this Colour Guide, so you might want to refer to some of the guides I wrote earlier. To do so just go to the top of the page where you'll find a link to a page containing direct links to all the Colour Guides I wrote to date.


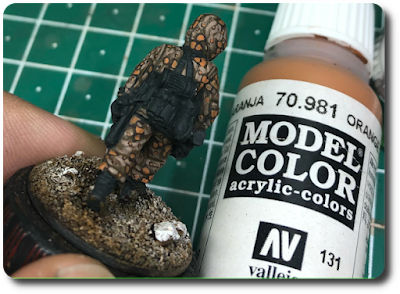

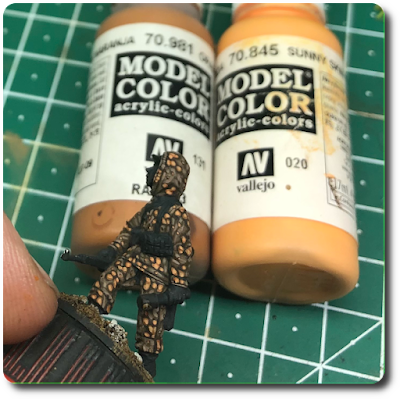
The orange dots now get a highlight consisting just of a tiny dot of VMC 70.981 Orange Brown mixed with VMC 70.845 Sunny Skin Tone in a 1/1 ratio

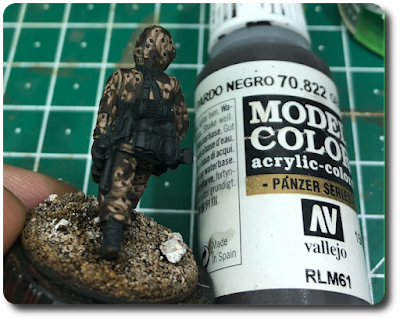
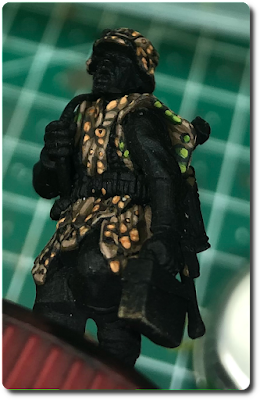
Finally the last step is adding a few little dots of VMC 70.822 German Camo Black Brown into the Orang-Brown dots.
And one thing to keep in mind is: When painting a Zeltbahn in Autumnal Oak Leaf the inner side would be in the spring version
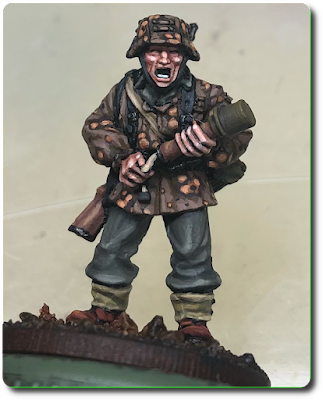
I hope this short guide was of use to some of you. As ever, should there be any questions or you'd want me to do a specific Colour Guide just let me know in the comments below.
 |
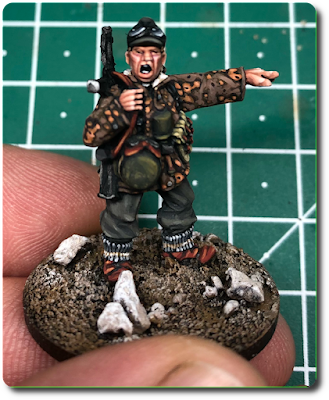
| Say "Cheese" |
Fantastic tutorial!
ReplyDeleteAll your works are amazing!
Very useful - thanks for posting this.
ReplyDeleteGreat tutorial - I'll have to pop back when I get round to doing my Germans for Market Garden. :)
ReplyDeleteEven when you explain it, I still find it all to be a mystery! Your skills and experience with the brush still count for a lot, and are pretty amazing to see, even step-by-step. Great stuff!
ReplyDeleteGreat tuto, superb painting and basing!
ReplyDeleteBeautifully painted and a great tutorial too.
ReplyDeleteGreat tutorial again, Nick! Will be sure to revisit this if I do this camo in the future.
ReplyDeleteExcellent tutorial Nick!
ReplyDeleteChristopher
They are real,works of art - nice tutorial
ReplyDeleteThanks for sharing ... it's great when the inner workings of such a great paint job is laid bare.
ReplyDelete